Vision inspection technology has been helping machinists take measurements and collect data since the 1930s. But thanks to breakthroughs in the last decade, this capability has become much more precise—and more practical—in recent years.
Vision inspection uses images to measure parts, verify that they’re in the correct position, and recognize their shape. As software and camera technology have improved, so, too, has vision inspection technology.
Think about how much the camera quality on your smartphone has evolved since 2011. This same technology is helping modern machine shops collect more accurate part data in a matter of seconds.
3 Major Breakthroughs in Vision Inspection Technology
NTMA members recently had the privilege of hearing Michael Vincent, Sr. Product Manager with Keyence Corporation of America, share his expert insights into the vision inspection industry.
You can watch the full presentation here. But here are some of the highlights, starting with 3 major breakthroughs in vision inspection technology:
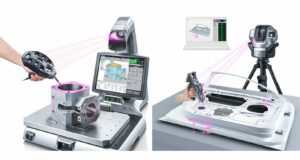
- Handheld CMMs (coordinate measuring technology). The handheld version of this technology just hit the market in the last 6 years. It uses infrared light to take incredibly precise measurements with an accuracy of up to .0003”. It’s shop floor ready, which means that it’s durable enough that users don’t need to worry about dust, dirt, or varying temperatures (within reason) affecting its readings or performance.
This innovative technology also combines integrated augmented reality and cameras to overlay the data on top of images, making it more user-friendly than other CMMs. Because images now accompany any data collected for a part, the operator can easily see exactly what they’re measuring.

- 3D surface profilometers. This technology takes typical 3D scanners a step further. New to the market in the last 10 years, 3D surface profilometers have a higher resolution than standard 3D scanners and are totally contactless. They use lasers, or white or blue lights, to analyze parts and generate 3D models from which users can generate measurements. The entire process takes less than a minute!
- Laser scanning confocal microscopes. Laser scanning is the most sophisticated and precise vision inspection technology currently available. The high-resolution laser scans surfaces and generates a 3D image. The part doesn’t have to be perfectly flat, and the laser is material independent. Whether your surface is matte, shiny, black, or white, the laser can still pick up the surface data. It may struggle with mirror surfaces, but it’s otherwise reliable for accurate data on surface finish or roughness.
What’s Driving Improvements in Vision Inspection Technology?
There are a couple driving forces behind these improvements in vision inspection technology:
- Advancements in camera technology. Improvements in camera technology have allowed for more efficient and precise vision-based measurement. Higher resolutions, better lens technology, and the ability to combine multiple cameras to generate 3D models have resulted in better field of view, depth of field, and precision in measurement.
- Advancements in software. Algorithms and AI allow for faster communication between the cameras and the data so users can generate information files in seconds. The advent of sub-pixel processing allows these devices to extract more data from a limited number of pixels. The result? An easier time measuring fine details, improved ability to capture more data points, and higher processing speeds.
What’s Next For Vision Inspection Technology?
The potential to improve this technology is fairly limitless, so it’s exciting to think about what lies ahead in the next decade. Here are a few predictions:
- Quantum computing and photonics will allow users to process more data at higher speeds and with improved accuracy.
- Software and AI will continue to improve to allow users to inspect parts as quickly as possible. Improvements in programming will also help modern machine shops save time during inspection.
- Data processing will continue to become faster. Current vision inspection technology occasionally takes days to process large data files. But there’s a demand among users for shorter processing lead times, and we expect that the technology will continue to advance.
As vision inspection technology becomes more sophisticated, modern machine shops will benefit from shorter lead times and more precise parts.
Want to keep up to date on vision inspection and other manufacturing technologies? Join NTMA and stay tuned for more informative webinars!